
Status plug-in timers offer real-time insights into system health, network connectivity, and application performance. They provide crucial updates,
like server status or device power failures, ensuring proactive monitoring and swift issue resolution.
What is a Status Plug-in Timer?
A Status Plug-in Timer is a software component designed to periodically check and report the operational state of a system, application, or device. It functions by executing predefined checks at scheduled intervals, then communicating the results – the ‘status’ – to a central monitoring point or user interface. These timers aren’t merely passive observers; they actively probe for functionality, verifying network connections, resource availability, and application responsiveness.
The core principle revolves around automating status updates. Instead of manual checks, the timer handles the process, providing continuous visibility. Status indicators, represented by numerical codes (like 1, 2, or 3, signifying pending, accepted, or rejected, respectively – as seen in systems like CMT3), offer a concise overview. Furthermore, these timers can be configured to deliver custom messages, detailing specific issues like HTTP 502 errors or device power failures, enhancing diagnostic capabilities.
Why Use a Status Plug-in Timer?
Employing a Status Plug-in Timer is crucial for proactive system management and minimizing downtime. Manual status checks are time-consuming and prone to human error; timers automate this process, offering continuous, reliable monitoring. This is particularly valuable for network monitoring, server status updates, and application health checks, ensuring immediate awareness of potential problems.
Timers facilitate rapid issue identification. Instead of reacting to user reports, administrators receive alerts regarding HTTP 502 errors, device power failures, or other critical events. This allows for faster troubleshooting and resolution, reducing the impact on users. Furthermore, integration with APIs, like Gemini, can enhance monitoring capabilities. The ability to define custom status messages provides context-specific information, while remote monitoring features enable oversight from anywhere. Ultimately, these timers translate to increased system stability, improved performance, and reduced operational costs.

Understanding the Components
Status plug-in timers comprise the plug-in itself, a core timer mechanism, and status indicators. These elements work together to deliver timely, actionable system health information.
The Plug-in Itself: Functionality
The status plug-in serves as the central hub for monitoring and reporting system states. Its primary function is to periodically check the health and operational status of designated components – be it network connections, server uptime, or application responsiveness. This involves initiating requests, interpreting responses, and translating them into understandable status codes.
Crucially, the plug-in doesn’t merely report; it actively interprets. It can differentiate between a temporary glitch (like an HTTP 502 error) and a more serious issue (such as a complete device power failure). The plug-in’s architecture allows for integration with external APIs, like the Gemini API, enhancing its capabilities. It can also be customized to deliver specific status messages, providing context beyond simple numerical codes.
Furthermore, the plug-in manages the timing of these checks, adhering to user-defined intervals. It’s designed to be lightweight, minimizing its impact on system resources while maximizing the frequency and accuracy of status updates. The plug-in’s core functionality is to gather, process, and present vital system information in a readily accessible format.
The Timer Mechanism: Core Principles
The timer mechanism at the heart of the plug-in operates on a simple yet powerful principle: scheduled execution. It utilizes a configurable interval to repeatedly trigger status checks. This interval, defined by the user, dictates how frequently the plug-in queries the monitored components for their current status.
Core to its operation is a non-blocking approach. The timer doesn’t halt system processes while awaiting responses; instead, it initiates checks asynchronously. This ensures minimal disruption to ongoing operations. The mechanism also incorporates error handling, gracefully managing failed requests or unresponsive components.
Furthermore, the timer’s precision is crucial. Accurate timing ensures that status updates reflect the most current state of the system. It’s designed to be resilient, continuing to function reliably even under heavy system load. The timer’s efficiency is paramount, balancing update frequency with resource consumption to provide timely and accurate status information.
Status Indicators: What They Represent
Status indicators within the plug-in provide a concise representation of system health and operational status. These indicators, often numerical codes like 1, 2, or 3, translate complex system states into easily understandable values. A ‘Status ID’ of 1 typically signifies a pending or indeterminate state, often seen during initial checks or processing.
A value of 2 generally indicates a successful or accepted status, confirming normal operation. Conversely, a ‘Status ID’ of 3 usually denotes a failure or rejection, signaling a problem requiring attention. Beyond these core codes, indicators can also represent specific error conditions, such as HTTP 502 errors indicating gateway issues, or ‘STATUS_DEVICE_POWER_FAILURE’ denoting power loss.
Understanding these indicators is vital for effective monitoring. They allow for quick identification of issues and facilitate targeted troubleshooting. The plug-in’s design prioritizes clear and unambiguous status reporting, enabling users to promptly address any detected anomalies.

Installation and Setup
Proper installation is key to utilizing the plug-in’s features. Ensure system compatibility (Windows/MacOS/Linux) before downloading. Follow the provided steps for a seamless setup process.
System Requirements & Compatibility
Ensuring compatibility is the first step towards a successful deployment of the Status Plug-in Timer. This plug-in is designed with broad operating system support, but specific requirements must be met for optimal performance.
Windows: Windows 10 (64-bit) or later is recommended. A minimum of 4GB RAM is required, alongside 100MB of free disk space. .NET Framework 4.7.2 or newer must be installed.
MacOS: MacOS 10.15 (Catalina) or later is supported. Similar to Windows, 4GB RAM and 100MB of free disk space are necessary. Ensure you have the latest version of Xcode command line tools.
Linux: Most major distributions (Ubuntu, Debian, Fedora, CentOS) are compatible. A 64-bit architecture is essential, along with 4GB RAM and 100MB of free disk space. Python 3.6 or higher is also a prerequisite.
Network: A stable internet connection is crucial for accessing external APIs (like Gemini API) and remote monitoring features. The plug-in supports both HTTP and HTTPS protocols.
Dependencies: Certain libraries may need to be installed depending on the chosen features. The installation guide provides a comprehensive list of dependencies for each operating system.
Downloading the Status Plug-in
Accessing the plug-in is straightforward through our official website. Navigate to the “Downloads” section, where you’ll find installers tailored for Windows, MacOS, and various Linux distributions. We prioritize secure downloads, so ensure you’re accessing the official source to avoid potentially harmful software.
Download Options: We offer both direct download links and a convenient package manager integration for Linux users. The direct downloads provide executable installers for immediate use. Package manager integration (e.g., apt, yum) simplifies installation and updates.
Version Control: Always download the latest version to benefit from bug fixes, performance improvements, and new features. Version numbers are clearly displayed alongside each download option. Check the “Release Notes” for a detailed overview of changes.
File Integrity: We provide SHA-256 checksums for each download to verify file integrity. This ensures that the downloaded file hasn’t been tampered with during transit. Instructions on how to verify the checksum are available on our website.
Account Requirement: While not mandatory, creating a free account allows you to track your downloads and access premium features.
Installation Steps (Windows/MacOS/Linux)
Windows: Run the downloaded .exe installer. Follow the on-screen prompts, accepting the license agreement and choosing an installation directory. Ensure you have administrator privileges. The installer automatically configures necessary system services.
MacOS: Double-click the .dmg file. Drag the application icon to your “Applications” folder. You may need to grant permissions in “System Preferences” > “Security & Privacy.” The plug-in integrates seamlessly with MacOS’s background processes.
Linux: Using a package manager (apt, yum), execute the command: sudo apt install ./status-plug-in.deb (example for Debian/Ubuntu). For other distributions, adapt the command accordingly. Ensure dependencies are resolved automatically.
Post-Installation: Regardless of the OS, restart your system after installation; This ensures all components are loaded correctly. Verify the installation by checking for the plug-in’s icon in your system tray or applications list. Initial configuration can then be accessed through the settings menu.

Configuring the Timer
Timer configuration involves accessing settings to define duration and update intervals. Customize these parameters to align with monitoring needs, ensuring timely and relevant status signals.
Accessing the Timer Settings
Navigating to the timer settings is the first step in customizing your monitoring experience. Typically, access is granted through a dedicated settings panel within the plug-in’s interface. This panel can often be found by locating the plug-in icon in your system tray or application menu and selecting “Settings” or “Configuration.”
Alternatively, some plug-ins integrate directly into existing system control panels. In such cases, you’ll find the timer settings alongside other system-level configurations. Look for sections related to “Monitoring,” “Status Updates,” or specifically the name of the status plug-in itself.
Upon entering the settings, you’ll likely encounter a series of options controlling the timer’s behavior. These options will allow you to define the duration of monitoring sessions, the frequency of status updates, and potentially, the types of status signals to be tracked. Ensure you have administrative privileges if prompted, as modifying these settings may require elevated permissions.
Setting the Timer Duration
Defining the timer duration dictates how long the status plug-in actively monitors the specified system or application. This setting is crucial for balancing comprehensive oversight with resource consumption. Shorter durations provide frequent, granular updates, ideal for volatile environments, while longer durations offer extended monitoring with less overhead.
Typically, duration is specified in minutes, hours, or even days, depending on the plug-in’s capabilities and your monitoring needs. Consider the expected stability of the monitored entity; a critical server might warrant continuous monitoring, while a less vital process could suffice with hourly checks.
Some advanced plug-ins offer scheduling options, allowing you to define specific time windows for active monitoring. This is particularly useful for systems with predictable usage patterns. Remember to save your changes after setting the desired duration to ensure the plug-in operates according to your specifications.
Defining Status Update Intervals
Status update intervals determine the frequency at which the plug-in transmits status information. This setting directly impacts the responsiveness of your monitoring system and the volume of data generated. Shorter intervals – like every few seconds – provide near real-time insights, crucial for detecting immediate issues.
However, excessively frequent updates can strain network resources and increase processing load. Longer intervals – such as every minute or hour – reduce overhead but may delay detection of transient problems. The optimal interval depends on the criticality of the monitored system and your network capacity.
Most plug-ins allow you to configure intervals in seconds, minutes, or hours. Consider the rate of change expected in the monitored system; rapidly fluctuating metrics require more frequent updates. Regularly review and adjust the interval to maintain a balance between responsiveness and efficiency.
Interpreting Status Signals
Status signals, represented by codes (1, 2, 3) or HTTP errors (502), indicate system health. Understanding these signals – acceptance, rejection, or failure – is vital for quick diagnosis.
Common Status Codes and Their Meanings
Decoding status codes is fundamental to effective system monitoring. A Status ID of 1 generally signifies a pending or indeterminate state – the process is active but hasn’t reached a conclusive outcome. Think of it as “waiting for confirmation.” Conversely, a Status ID of 2 typically indicates acceptance or success; the operation completed as expected, and the system is functioning correctly. This is a positive signal, confirming healthy operation.
However, a Status ID of 3 almost universally denotes rejection or failure. This signals an issue requiring immediate attention. Coupled with this, encountering an HTTP 502 Bad Gateway error suggests a communication problem between servers, often indicating a server is unavailable or overloaded. A STATUS_DEVICE_POWER_FAILURE error, as the name implies, points to a power issue affecting a device, potentially requiring hardware intervention. Recognizing these codes allows for targeted troubleshooting and rapid restoration of service, minimizing downtime and ensuring system stability.

Troubleshooting Status Errors (HTTP 502, Device Power Failure)
Addressing errors swiftly is crucial. For an HTTP 502 Bad Gateway, first verify the upstream server’s status. Is it running and accessible? Check network connectivity and firewall rules. Browser caching can sometimes mimic this error; try clearing your cache or using a different browser. If the issue persists, investigate server logs for clues about the root cause – overloaded resources or configuration errors are common culprits.

A STATUS_DEVICE_POWER_FAILURE requires a different approach. Begin by checking the device’s power supply – is it securely connected and functioning? Examine power cables for damage. If using a power strip, ensure it’s switched on and operational. Update device drivers, particularly network adapters (like Intel AX211), as outdated drivers can sometimes trigger false positives. If the problem continues, hardware diagnostics may be necessary to identify a failing component.
Understanding Status ID Values (1, 2, 3)
Status ID values provide a concise, numerical representation of a process’s state. A Status ID of 1 typically indicates a ‘pending’ or ‘submitted’ state – the process is awaiting action. Think of a paper submission; it’s received but not yet reviewed. A Status ID of 2 generally signifies ‘accepted’ or ‘successful completion’. This means the process has met the required criteria and is considered valid, like acceptance of a research paper.

Conversely, a Status ID of 3 almost universally denotes ‘rejected’ or ‘failed’. This indicates the process did not meet the necessary conditions and was unsuccessful, mirroring a paper rejection. These IDs are invaluable for automated monitoring and reporting, allowing systems to react appropriately to different outcomes. Understanding these codes streamlines troubleshooting and provides clear insight into system operations, especially within platforms like CMT3 for conference submissions or ICASSP review processes.

Advanced Features & Customization
Unlock deeper control with API key integration (like Gemini API), custom status messages, and remote monitoring capabilities. Tailor the plug-in to your specific needs for enhanced functionality.
API Key Integration (Gemini API)
Integrating a Gemini API key significantly expands the capabilities of the status plug-in timer, enabling advanced functionalities beyond basic status checks. This integration allows for sophisticated analysis of system data and the generation of intelligent, context-aware status updates.
The process typically involves securely inputting your Google API key within a dedicated section of the plug-in’s settings. Crucially, validation should occur independently of other model selections, ensuring seamless operation. Currently, the default Google LLM is Gemini 2.0 Flash, eliminating the need for explicit configuration.
By leveraging the Gemini API, the plug-in can interpret complex system logs, predict potential issues, and provide proactive alerts. This moves beyond simple “up” or “down” status indicators to offer actionable insights. For example, the API can analyze error messages and suggest potential solutions, or identify performance bottlenecks before they impact users. The API key unlocks a new level of intelligence and automation within your monitoring system.
Custom Status Messages
Custom status messages empower users to tailor the information conveyed by the plug-in timer, moving beyond generic alerts to provide specific, actionable details. This feature is crucial for teams requiring nuanced communication regarding system health and operational status.
The ability to define custom messages allows for clear and concise reporting, tailored to the specific audience. Instead of a simple “Server Down” notification, you could receive “Database Server experiencing high latency – investigating root cause.” This level of detail significantly reduces ambiguity and accelerates problem resolution.
Configuration typically involves a user-friendly interface where you can map specific status codes or events to corresponding messages. Consider incorporating relevant context, such as affected services or potential impact. Well-crafted custom messages enhance situational awareness and streamline communication during incidents, improving overall system reliability and responsiveness.
Remote Monitoring and Control
Remote monitoring and control capabilities extend the utility of the status plug-in timer beyond simple alerts, enabling proactive management of systems from any location. This is particularly valuable for distributed teams and infrastructure spanning multiple geographical sites.
Typically, this functionality is achieved through a web-based dashboard or API integration, allowing authorized users to view real-time status updates, historical data, and even initiate corrective actions remotely. For example, a system administrator could restart a service or adjust timer settings without physically accessing the server.
Secure access controls are paramount, ensuring that only authorized personnel can modify configurations or execute commands. Integration with existing monitoring platforms, like those utilizing Gemini API keys, further enhances visibility and streamlines workflows. Remote control features minimize downtime and optimize resource utilization, contributing to a more resilient and efficient infrastructure.

Real-World Applications
Status plug-in timers are vital for network monitoring, server status updates, and application health checks. They ensure system reliability and rapid problem identification.
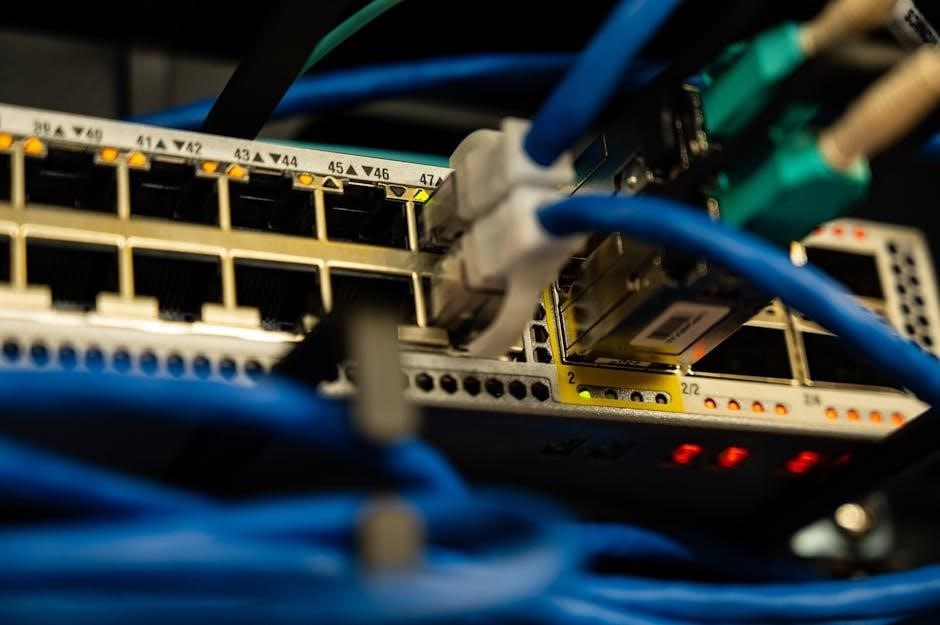
Network Monitoring
Status plug-in timers excel in comprehensive network monitoring, providing continuous health assessments of critical infrastructure. By regularly checking network devices – routers, switches, and firewalls – these timers detect connectivity issues, latency spikes, and potential security breaches proactively. The timers can be configured to send alerts upon detecting an HTTP 502 error, indicating a gateway or proxy server problem, or a STATUS_DEVICE_POWER_FAILURE, pinpointing hardware malfunctions.
Furthermore, the timers can monitor Wi-Fi connection stability, automatically triggering troubleshooting steps when a browser fails to display the login page. This is particularly useful in environments like new educational facilities where network configurations are frequently updated. The ability to define custom status update intervals ensures that monitoring aligns with network traffic patterns and critical operational periods. Utilizing Status ID values (1, 2, 3) allows for granular categorization of network events, facilitating efficient analysis and resolution.
Server Status Updates
Status plug-in timers are invaluable for maintaining server uptime and performance. They enable continuous monitoring of server health, tracking key metrics like CPU usage, memory consumption, and disk space. Configured timers can instantly alert administrators to critical issues, such as unexpected downtime or resource exhaustion, minimizing service disruptions. The timers’ ability to detect and report HTTP 502 errors originating from server-side proxies is crucial for identifying application-level problems.
Regular status updates, defined by customizable intervals, provide a historical record of server performance, aiding in capacity planning and trend analysis. Integration with APIs, like Gemini API, can enhance monitoring capabilities, providing deeper insights into server behavior. Utilizing Status ID values (1, 2, 3) allows for precise categorization of server events – pending, accepted, or rejected – streamlining troubleshooting efforts. Proactive monitoring ensures swift responses to potential failures, safeguarding data integrity and user experience.
Application Health Checks
Status plug-in timers are essential for verifying the operational integrity of applications. They perform automated health checks, simulating user interactions and validating core functionalities. These checks can confirm database connectivity, API responsiveness, and the proper execution of critical business logic. Timers can be configured to detect and report issues like application crashes or performance degradation, ensuring a seamless user experience.
Customizable status update intervals allow for frequent monitoring, providing early warnings of potential problems. The ability to define custom status messages offers granular control over reporting, enabling precise identification of the root cause of issues. Integration with monitoring platforms facilitates centralized visibility and automated remediation. Detecting HTTP 502 errors within application workflows highlights potential proxy or backend service failures. Utilizing Status ID values aids in categorizing application events, streamlining debugging and resolution efforts, and maintaining optimal application performance.